

Although iPhoto for iOS isn’t quite as robust as its OS X counterpart, it’s a very capable image editor—and it can do a few cool tricks you simply can’t do on your Mac.
Straighten your photos
iPhoto for iOS allows you to straighten your photos in a few smart ways. The first is by auto-detecting a strong horizon line. Open iPhoto, choose a photo and then tap Edit. Now tap the Crop & Straighten icon in the bottom left. If the photo displays a white line across it with icons at either end, then that means a horizon line has been detected. To proceed with straightening, simply tap the arrow icon at the right.
Unfortunately, iPhoto can’t always detect a horizon line and that means you’ll have to make the adjustment yourself. The Crop & Straighten mode places a dial under your photo, and you can straighten your photo simply by dragging the dial left or right. A grid overlaid on your photo as you turn the dial, lets you straighten with visual cues in your photo.
What happens when your photo has no visual cues, but still feels off-kilter? iPhoto for iOS has one more strategy to assist you, and it’s a lot of fun. Choose a photo you want to straighten and then hold the iPad or iPhone up in front of you. Now tap the dial. iPhoto then calls on the gyroscope in your device to help you straighten the image. Simply tilt the iPad or iPhone to the left and right; as you do, you’ll notice that the photo remains upright. It’s helpful to tilt your head as you tilt the device so that you have a better sense of the final crop. Once you’re happy with the position of the photo, tap anywhere on the screen to lock it in.
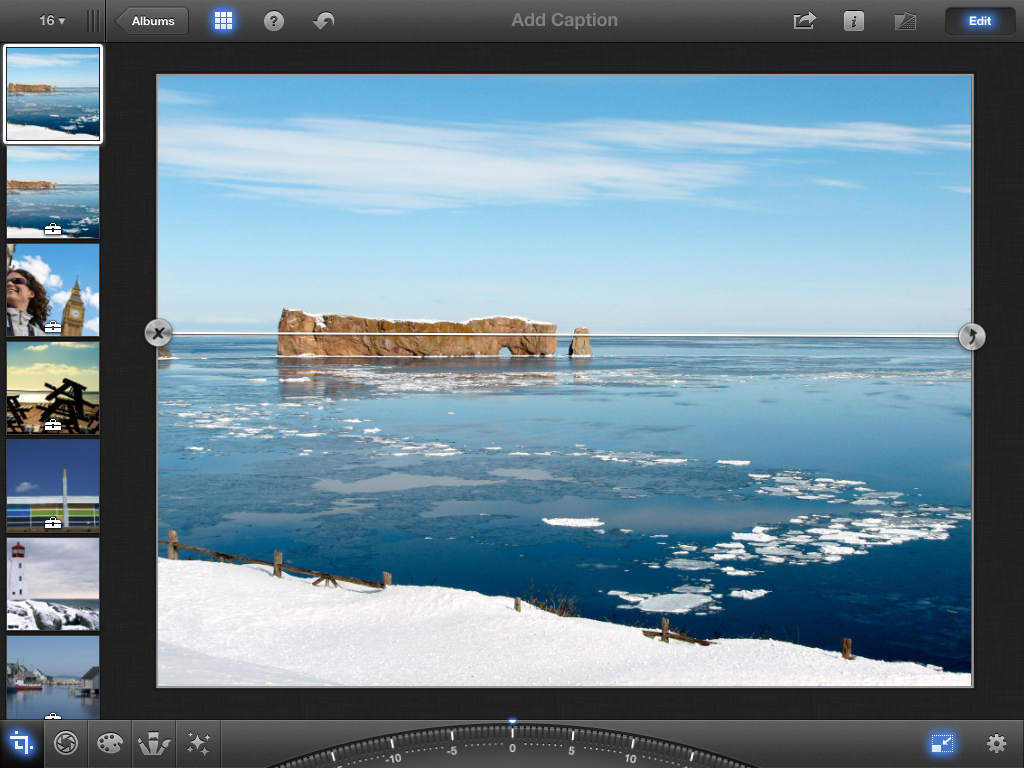
iPhoto will often detect strong horizon lines; to straighten your photo, tap the arrow icon at the right.
Apply and tweak effects
iPhoto for iOS has many more effects than its desktop counterpart. Open iPhoto, choose a photo and then tap Edit. Now tap the Effects icon in the lower left. A swatch of possible effects will then pop into view. There are two sets of effects that are particularly impressive: Vintage and Ink Effects. Choosing Vintage presents you with a set of six effects, and each of them gives your photo a warm, antique feel. Once you’ve chosen an effect that you like, you can adjust the size and placement of the vignette by pinching the photo and dragging your finger across it. And if you don’t like the vignette, you can toggle it on and off by tapping the vignette icon at the right (tap the yellow question mark on the top, if you’re not sure where it is).
iPhoto for iOS has many more effects than its desktop counterpart. Open iPhoto, choose a photo and then tap Edit. Now tap the Effects icon in the lower left. A swatch of possible effects will then pop into view. There are two sets of effects that are particularly impressive: Vintage and Ink Effects. Choosing Vintage presents you with a set of six effects, and each of them gives your photo a warm, antique feel. Once you’ve chosen an effect that you like, you can adjust the size and placement of the vignette by pinching the photo and dragging your finger across it. And if you don’t like the vignette, you can toggle it on and off by tapping the vignette icon at the right (tap the yellow question mark on the top, if you’re not sure where it is).

Vintage effects can give your photos a warm, nostalgic look. Pinch and drag to adjust the vignette.
Ink Effects give your photos texture and serrated edges that make them look like they’re on a tattered canvas. As with Vintage, there are six effects you can choose from. When you’ve found one that you like, you can swipe left and right on the photo to increase or decrease the saturation, and swipe up and down the photo to increase or decrease the appearance of the texture. Note that while these effects are applied over other edits, effects cannot be combined.
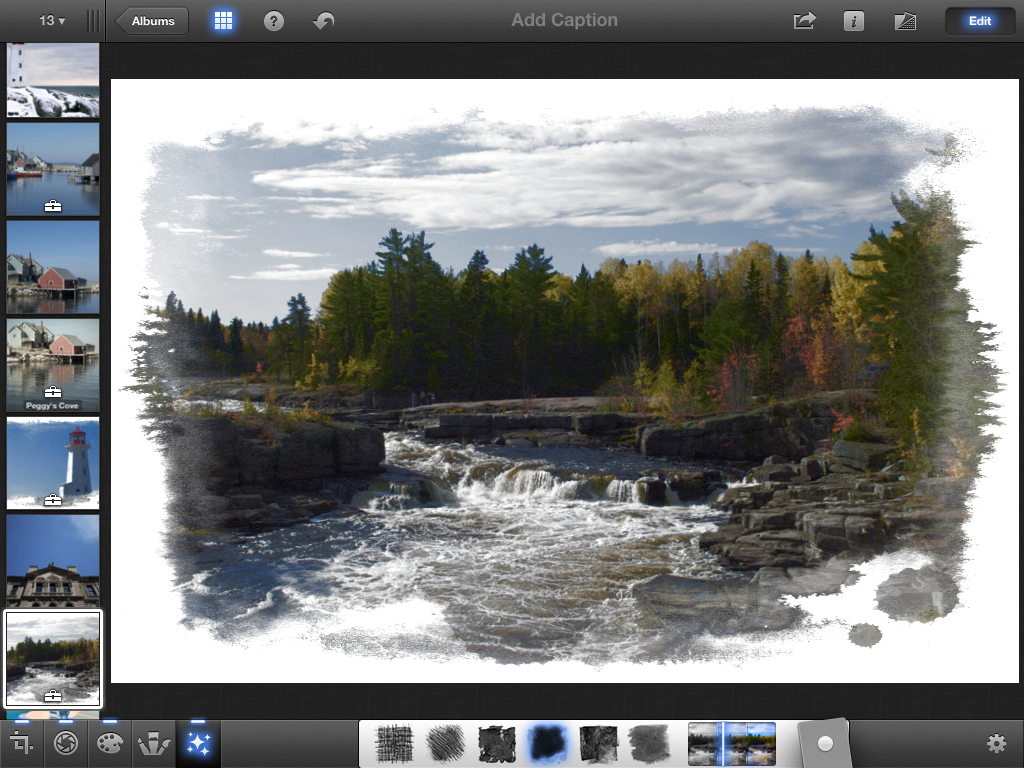
You can choose from six Ink Effects.
Expand dynamic range
Taking a photo in certain lighting conditions can result in a constrained dynamic range, or more simply put, the darkest parts of the photo are not pure black and/or the brightest parts of the photo are not pure white. As a result, your photo may look dull or washed out.
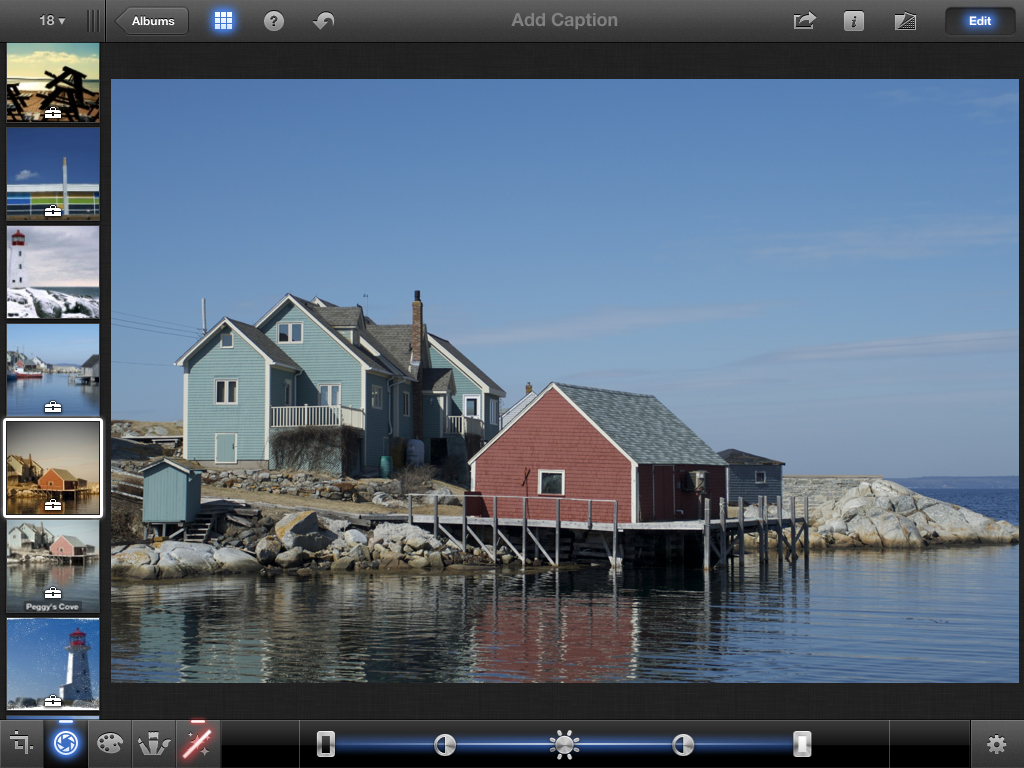
Luckily, iPhoto for iOS gives you a quick way to fix the exposure and make your photos pop. Open iPhoto, choose a photo and then tap Edit. Now tap the Exposure icon in the bottom left. Under your photo you will see a slide control that lets you adjust the exposure and contrast of the image. Ah, but there’s something more to this slider! The position of the controls actually gives you important information about the dynamic range of the image, similar to a histogram in a desktop app. At the left end, you’ll see a silver rectangle showing the value of the darkest pixel in your photo, and at the other end you’ll see a silver rectangle showing the value of the lightest pixel in your photo.
You can expand the dynamic range of your photo by dragging those controls towards the thin dividers at either end of the slider, which represent the darkest and lightest points possible. (Notice that if you go too far beyond those dividers, the ends will glow red, indicating that you’re now dropping out shadows or blowing out highlights.) Once you’ve set the correct dynamic range, you can then fine-tune the photo’s exposure using the slider’s brightness and contrast and contrast controls. And remember that you can tap the Show Original icon in the top right at any time to gauge your progress.
Taking a photo in certain lighting conditions can result in a constrained dynamic range, or more simply put, the darkest parts of the photo are not pure black and/or the brightest parts of the photo are not pure white. As a result, your photo may look dull or washed out.
Luckily, iPhoto for iOS gives you a quick way to fix the exposure and make your photos pop. Open iPhoto, choose a photo and then tap Edit. Now tap the Exposure icon in the bottom left. Under your photo you will see a slide control that lets you adjust the exposure and contrast of the image. Ah, but there’s something more to this slider! The position of the controls actually gives you important information about the dynamic range of the image, similar to a histogram in a desktop app. At the left end, you’ll see a silver rectangle showing the value of the darkest pixel in your photo, and at the other end you’ll see a silver rectangle showing the value of the lightest pixel in your photo.
You can expand the dynamic range of your photo by dragging those controls towards the thin dividers at either end of the slider, which represent the darkest and lightest points possible. (Notice that if you go too far beyond those dividers, the ends will glow red, indicating that you’re now dropping out shadows or blowing out highlights.) Once you’ve set the correct dynamic range, you can then fine-tune the photo’s exposure using the slider’s brightness and contrast and contrast controls. And remember that you can tap the Show Original icon in the top right at any time to gauge your progress.
If the ends of the exposure slider do not reach the thin dividers at either end, your photo lacks full dynamic range.
Use Show Strokes and Edge Detection for precise editing
Although iPhoto gives you a great collection of adjustment brushes such as Saturation and Sharpen, it’s sometimes difficult to make precise edits using finger swipes. Invariably, your finger will go out of bounds and areas that you don’t want changed will show the effects of your edit. A good solution to this issue is to use Edge Detection in combination with the option to Show Strokes.
Open iPhoto and choose a photo that you’d like to tweak. Tap Edit, and then tap Brushes. Choose a brush—for this example, I chose saturate—and then tap the Edge Detection icon in the bottom right. Now tap the gear icon next to it to call up the brush controls. The second option will be Show Strokes; turn it on and then tap anywhere in your image to make the brush controls pop-over disappear.

Use Show Strokes and Edge Detection for more precise control over edits.
Place your finger in the center of an area with a well-defined edge—enlarge the photo if necessary—and then slide your finger across it. As you do, you’ll see that you’re highlighting it in red. Continue to slide your finger around, highlighting the entire area you want to edit. Thanks to iPhoto’s Edge Detection, you’ll notice that the red highlight does not follow you if you drag your finger across the object’s edge. (And if you happen to get a few errant brush strokes, remember that you can get rid of them using Erase.)
Once you’ve highlighted everything you want to edit, tap the gear icon to return to the brush controls and turn off Show Strokes. You’ll immediately see the results of your efforts; if the edit is too strong, simply use the slider at the top of that window to reduce the intensity.
No comments:
Post a Comment