One iBooks to rule them all.
Apple’s iBooks provides one of the best, most accessible ereading experience on the iPad, in my opinion, and it’s pretty darn simple to use.
That said, there’s always room to learn just a few more tricks to make the experience even better for you. Here, then, are five tips to master iBooks on your iOS device of choice.
Study Better – Highlight, Search, And Make Notes In The Text
iBooks is not only a fantastic e-reading app on your iPhone or iPad, but it’s also a fantastic study tool. If you need to read books for class or your own learning objectives, you can use iBooks to highlight words or passages, search the text for specific words or phrases, and make notes that appear in the margins as little colored sticky notes.
Using these tools could help you become a much more organized studier, letting you go back to a passage in a book to remember the important things with a couple of taps. Here’s how, using iBooks 3.1, the latest version of iBooks.
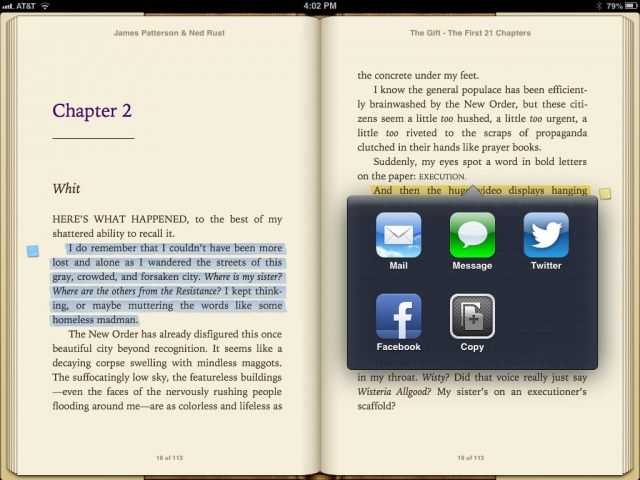
When reading an iBook, tap and hold on any text you want to select, like you would in Safari or Pages. A pop up bar will appear, letting you Copy, Define, Highlight, make a Note, Search, or Share the text you chose. Tap on Highlight.
The pop up bar will change to give you new highlighting options, which include changing the color of the highlight or adding a note, itself in the same color as the highlight. You can also Share to Mail, Message, Twitter, or Facebook from this menu, as well. If you tap away from the selected word and lose the pop up menu, simply tap the colored highlighted area again to bring the highlight menu up again.
Tap the notecard icon, helpfully the same color as the text you just highlighted, and type in any notes you want in the resulting pop up note card. Tap away from the note card to close the text entry window, and you’ll see a little colored sticky note icon in the margin next to your highlighted text.
If you want to search for a given word in the text, tap and hold on a word in the body of the book and select Search from the pop up menu. You can also tap the magnifying glass icon in the upper right of the screen and type in a search term or text string. iBooks will look for it in the book itself. If you want to search the web, or Wikipedia, there are buttons at the bottom of the search window to send that term out to Safari.
Categorize And Manage Your Larger iBooks Library With Ease
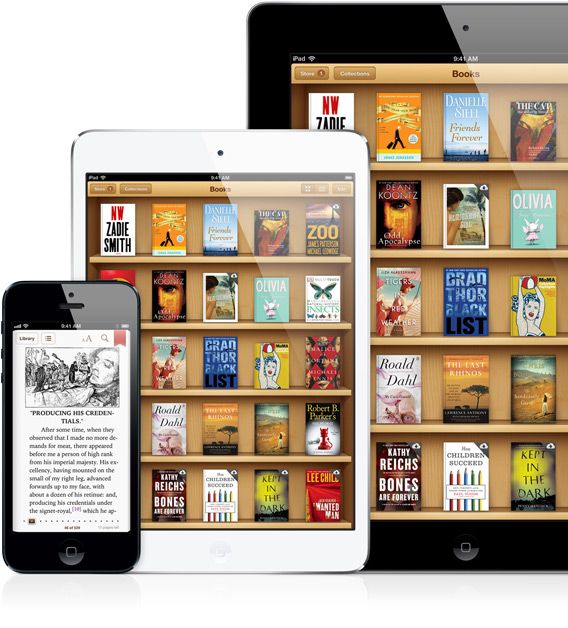
Is your iBooks library starting to outgrow those beautiful skeuomorphic wooden bookshelves that Apple provided for you? Have you purchased way too many Star Wars novels, only to find them crowding out your beloved Jane Eyre collection?
Well, there’s a simple way to manage an epic, ever-growing iBook collection, of course (why else would I be writing this), and here’s how.
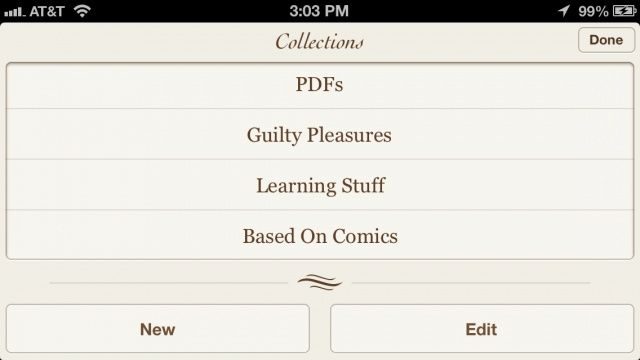
First of all, decide what categories make the most sense for you, based on the books you own. Should you categorize by genre, subject matter, have a list of favorites? It’s up to you, and you can of course create categories for anything, like “books my mom likes,” or “books that no one should ever see me reading, but that I love anyway.” Ahem.
Once you decide, then, head on over to your iOS device and tap the “Collections” button (on an iPad) the “Books” button on an iPhone or iPod touch. You can then create your own collections by tapping the “New” button, or edit the collection names you’ve already created by tapping on the (duh) “Edit” button. The default categories are Books and PDFs. You can be more creative than that, right? Of course you can.
Once you’ve created the categories, it’s time to start organizing your books. Return to your shelves and tap the Edit button in the upper right hand corner of the iPad screen, or the upper left hand corner of your iPhone or iPod Touch screen. Tap all the books on the shelves that you want to move to the new category, then tap the “Move” button. Notice that you’ll have another chance to create new categories and edit the names here as well.
That’s all there is to it!
Slide On The Dotted Line To Riffle Your Way Through An iBook
Riffle me this.
When reading an iBook on your iPad or iPhone, you typically tap the right side of the page to go forward, and tap the left side of the page to go backward, right? If you want to skip to a different part of the iBook, you can tap on the table of contents button in the upper left and tap to the chapter you want to go to.
How do you quickly navigate more than one page forward or backward, though? With a real book, you just flip through the pages until you find the one you’re looking for. In iBooks, you don’t riffle through pages, but you can navigate quickly and visually to other portions of the book.
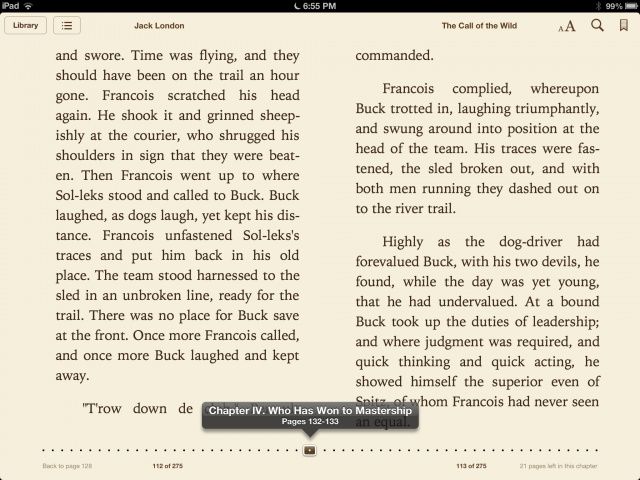
If you tap in the center of an iBook on your iPad, iPhone, or iPod touch, you’ll see a dotted line appear along the bottom. This will show up whether you’re in portrait or landscape orientation.
Tap the little brown rectangle that denotes the current page, and hold your finger down. Now slide your finger right to riffle forward through the book, and to the left to riffle backwards through the book. It’s really that simple. If it’s an iBook with chapters, you’ll see the title along the top of the pop-up menu, along with the pages you’re navigating through.
Stop when you get to the chapter or page you want, and iBooks will open to that page, letting you read from that spot. Slick, huh?
Now you can skip taping the page turn over and over to get farther along int he book, as well as sticking to the start of the various chapters. Just riffle your way to the part you want to read, and all will be well.
Frugal Reader? Access Free Sample iBooks
With iBooks on your iPhone or iPad (or iPad mini, my favorite reading device), you can download electronic books from the convenient privacy of your very own iOS device. You never need to enter a bookstore again (sorry, Barnes & Noble!), making purchases of guilty pleasures and important intellectual tomes equally simple.
A real bookstore, though, lets you browse through the books before you buy them. Heck, you can pick one off the shelf, riffle through the pages, and even (gasp!) read some of it without paying for the book. iBooks has a way to allow you to see inside a book before purchasing it, as well, and I can’t believe I keep forgetting that the feature is there.
If you’re like me, and constantly forget about sample iBooks, here’s your reminder.
When you’re looking at your iBooks Library shelves, tap on the Store button in the upper left corner of the screen (on the iPad–the iPhone Store button is in the upper right hand corner, go figure). This will take you to the wonderful world of the iBooks store, which is like iTunes or the App Store for books.
Now, via a combination of searching and/or browsing, find a book you want to read a bit of before you commit to the purchase. Tap on the cover of the book there in the iBooks store, and it will pop up a detail page. Right next to the button with the price on it? That’s where you’ll find the Sample button in all its ALL-CAPS glory: SAMPLE.
Tap that button and a lovely little sample will download to your iPhone or iPad, ready for you to look through. It will even have a cute little red Sample sash diagonally across the right top corner of the book cover on your iBooks shelf, so you can be sure not to mistake it for a full length book. Whew.
Tap the cover to read the sample iBook as you would any other title in your collection. You’ll get a nice bit of the whole thing: the sample I downloaded of Iain M. Banks’ science fiction novel, Matter, came through with a full 76 pages.
Fix The Multiple Purchased Books Bug
When I opened iBooks on my iPad mini the other day, I tapped the Collections button, and selected “Purchased Books” as my filter option, to see what I had in my account that I wanted to read. Oddly, I saw a ton of the same book, over and over, sitting on the shelves.
For some reason, this only happens on my iPad mini. My iPhone only shows one copy of each book, even when I select the same Purchased Books option. Same with my iPad 3. But, it’s still annoying on the mini, so I went online to try and figure out what was going on.
There is a bug here that other users are seeing, as well, and there’s really only one way to “fix it.”
Head into the Settings app on your iPad, and swipe down to the iBooks icon in the left-hand column. Tap the iBooks icon and yo’ll see all the options to the right.
Tap The Show All Purchases toggle to OFF, and then hit the Home button. Now, when you launch iBooks again on your iPad, it won’t give you the option to show the purchased books. When you tap Collections, you’ll only see Books, PDFs, and any other custom collections you’ve created to sort and shelve your epubs or iBooks.
Now, if you want to see what you’ve purchased, tap the Store button at the top of the iBooks shelf, and use the Purchased tab in the iBooks store to see what you can download.
While this doesn’t make the issue go away, it does keep the clutter down, especially if you have a significant number of Books in your Purchased account. Hopefully, this is not happening to you, and if it is, Apple will fix it soon.
Data source: Cult of Mac (By Rob LeFebvre)
[Apple Discussions Via iMore]


Thank you very much !
ReplyDeleteHi Oltjano Terpollari, welcome
Delete